 ×
×
Root Causes and Proven Solutions for Dental Labs
Zirconia has become the default choice for full-coverage restorations, and for good reason. Its flexural strength is unmatched among all-ceramic materials, and the aesthetics of modern multilayer blocks now rival those of lithium disilicate in many indications. Yet anyone who has spent time at a sintering furnace knows the frustration: a crown comes out of the cycle looking dull, grayish, and lifeless — the translucency is off, the chroma feels flat, and the vitality you expected simply isn't there.
This grayness is not bad luck or some unexplainable quirk of the material. It is the visible result of specific, traceable variables across material selection, equipment condition, and processing technique. Understanding the root causes is the first step toward eliminating them. This article breaks down the four primary culprits behind gray sintering results, walks through salvage options for finished units, and lays out a prevention workflow you can standardize in your lab.
The Four Root Causes of Gray Zirconia
1. Furnace and environmental contamination. This is the most common offender and the one most often overlooked. Heating elements degrade over time — silicon carbide and molybdenum disilicide rods both volatilize compounds at high temperature as they age, and those vapors deposit onto the restoration surface. Equally problematic is residual contamination inside the chamber: leftover coloring liquid, low-quality crucibles that shed metallic oxides, and sintering beads that have not been cleaned or replaced in months. Any colored metallic element lingering in the muffle will be drawn into the zirconia during the cycle, pulling the final result toward gray.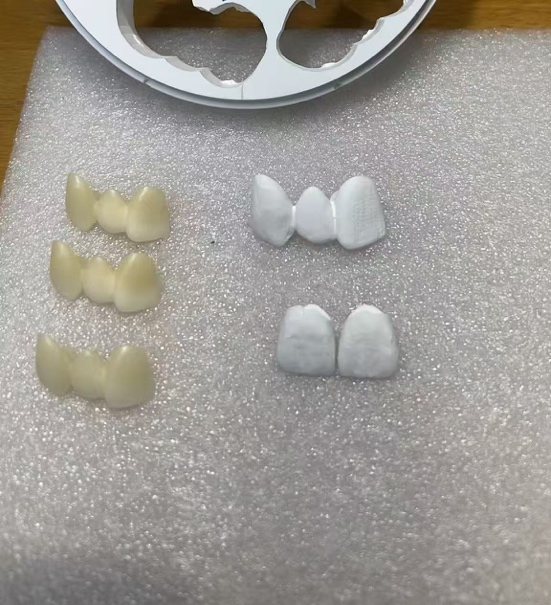
2. Mismatch between translucency and substrate color. High-translucency and ultra-high-translucency zirconia is a double-edged sword. The same light transmission that delivers beautiful incisal effects also reduces the material's ability to mask what lies beneath it. Choose a block that is too translucent — certain multilayer anterior zirconias, for example — and the body layer simply cannot block the underlying color. When the prepared tooth is discolored (a non-vital tooth, a metal post and core), that darkness transmits straight through the restoration, and the eye reads the result as gray and dim. The crown isn't actually gray; it's transparent over something dark.
3. Improper sintering parameters. The sintering cycle is where the physical microstructure is set, and shortcuts show up as optical defects. A heating rate that is too fast, or a holding time at peak temperature that is too short, leaves grain growth incomplete. Underdeveloped crystals alter how light refracts through the material, robbing it of depth and translucency. Overcrowding the firing tray compounds the problem: when units are packed too tightly, heat distribution across the crucible becomes uneven, and pieces in the cooler zones sinter differently from those in the hot spots.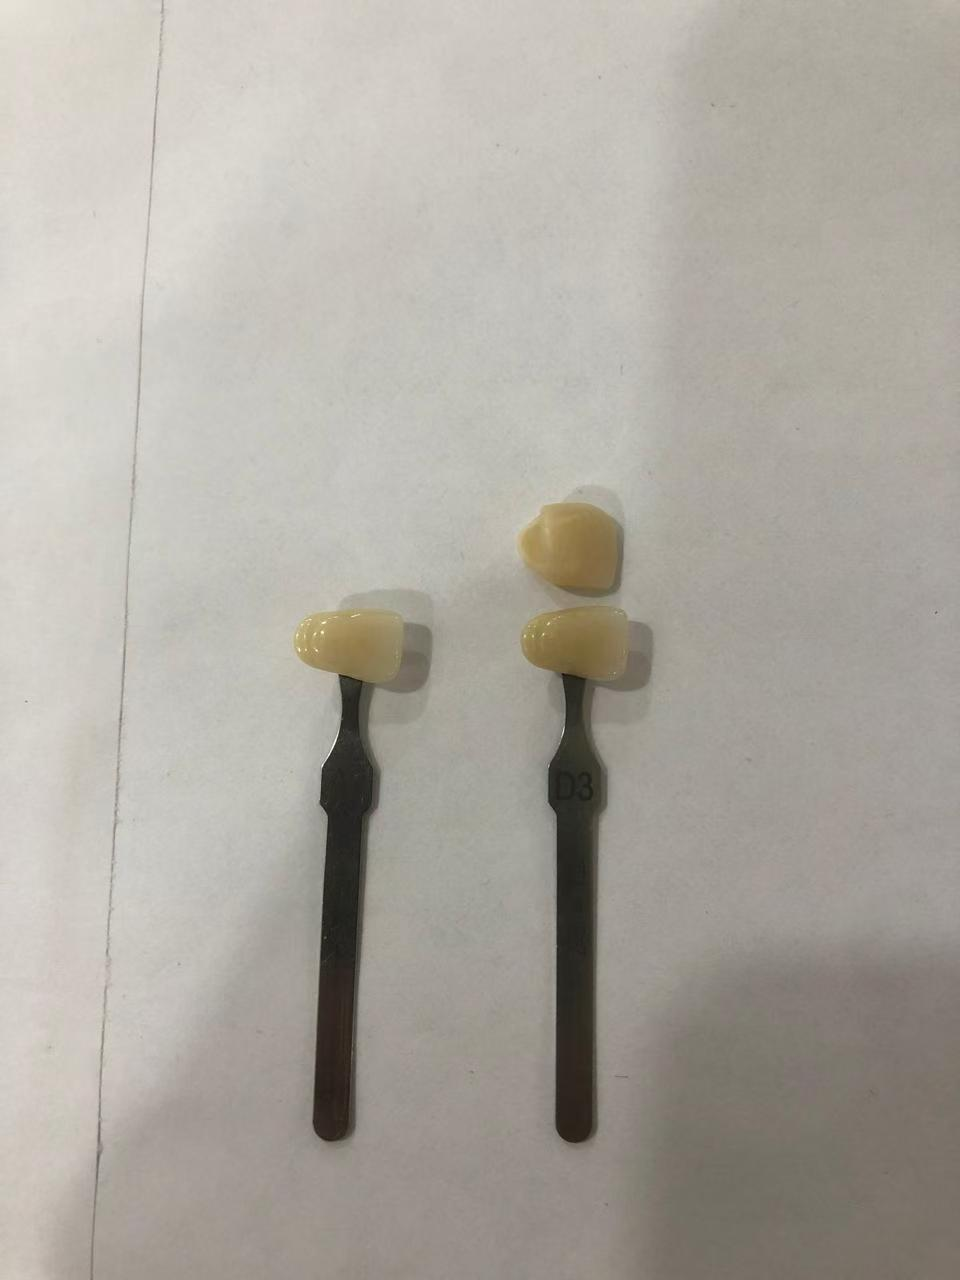
Matching inherently low-value shades, like the VITA D-group (Reddish-Gray), is a delicate balancing act. Look at this D3 comparison. The zirconia crown above captured the opacity but completely missed the vitality, resulting in a flat, 'dead stone' appearance rather than a natural tooth structure.
4. Errors in coloring and liquid handling. Coloring liquid that soaks too long oversaturates the framework, while a restoration loaded into the furnace before it has fully dried still carries moisture. That residual water flashes off during ramp-up and disrupts both color development and crystal formation. Unstable or low-quality coloring liquid — with inconsistent ion concentration batch to batch — produces unpredictable, often muddy results.
Emergency Salvage: Rescuing a Gray Unit
When the problem is discovered only after the unit is out of the furnace, several second-stage corrections can recover it.
Option A — External staining and adjustment. Use the principle of complementary color. A trace of yellow or orange stain knocks down the gray value and shifts the restoration toward a warmer, more vital tone. Keep the glaze layer thin; an overly thick translucent glaze deepens the visual dullness rather than correcting it.
Option B — Cut-back and layering. If wall thickness allows, perform a localized cut-back on the labial or buccal surface and rebuild with a high-opacity or high-value body and opal porcelain, then re-fire. This restores masking power and brightness where the monolithic block fell short.
Option C — A note for the clinician. Brightness can also be raised from the inside. Advise the dentist to seat the restoration with an opaque, masking resin cement — an opaque white shade, for instance — to lift the value beneath a translucent crown and block a dark substrate.
Prevention: Building a Standardized Workflow
Salvage is reactive. The real mark of a strong lab is a workflow that keeps gray results from happening in the first place.
Proactive Furnace Maintenance: Standardized equipment maintenance is the single highest-leverage habit. Run a chamber cleaning program on a regular schedule, firing dedicated cleaning blocks or scrap white-zirconia pieces to adsorb accumulated contamination from the muffle. Replace sintering beads on a fixed interval and keep the crucible clean — don't wait for a visible problem.
Deliberate Material Selection: Material selection should be deliberate, not default. Match translucency to the clinical situation: reserve ultra-high-translucency for veneers and anterior single units over healthy preparations, and choose high- or medium-translucency for posterior units and any case — bridges, discolored abutments — that demands masking. Account for the prep volume and the stump shade before you pick the block, not after.
Mastering the Sintering Curve: Strict adherence to the sintering curve is non-negotiable. Always reference the specific sintering parameters provided by the zirconia manufacturer, as chemical formulations and phase-transition requirements vary significantly between brands. However, treat the manufacturer's curve as your baseline. Because actual muffle temperatures can fluctuate depending on the age, make, and calibration of your specific furnace, the ultimate optimal temperature must be fine-tuned and verified using your laboratory's unique equipment.
Strict Drying Protocols: Finally, discipline the drying step. After coloring, dry the framework completely under an infrared lamp or equivalent equipment so that all moisture has evaporated before it enters the furnace. This one step prevents a surprising share of color failures.
Conclusion
Gray zirconia is not a mystery and certainly not metaphysics. It is the external expression of details — the condition of your heating elements, the translucency you selected, the ramp rate you programmed, the moisture you didn't dry off. Control those variables systematically, and the grayness disappears.


 EN
EN

